Day 2 at the seminar

We spent the morning finishing our doll’s lips and nose, then learnt how to pull the threads to define the nose.

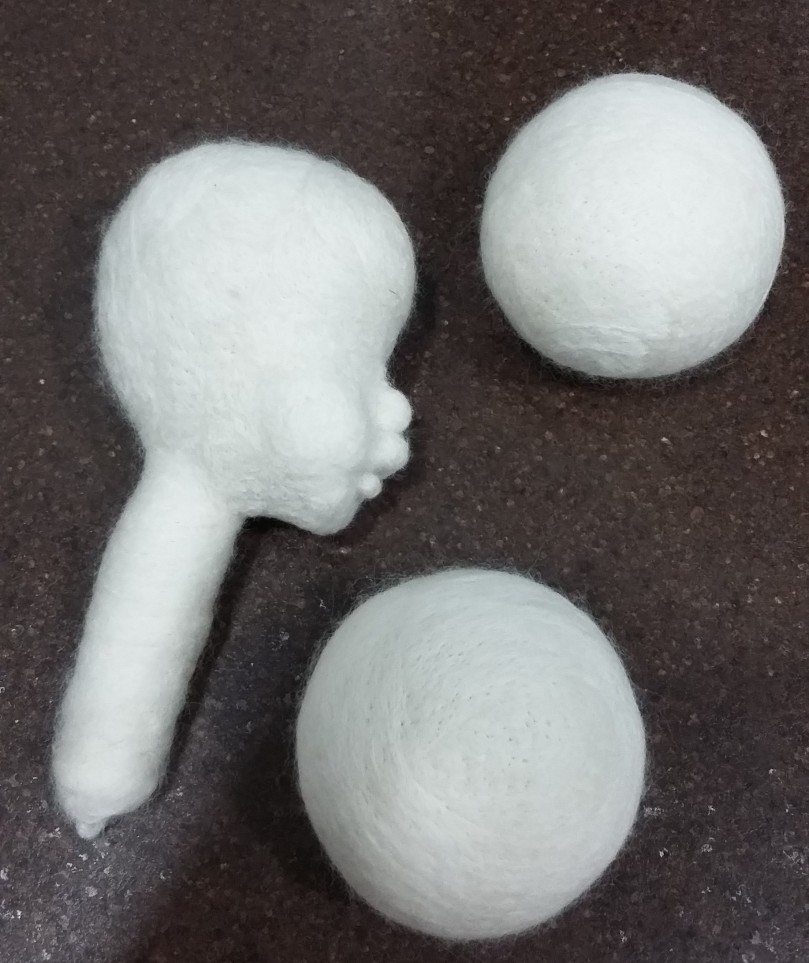
…….and here she is, after several lip & chin surgeries. She still doesn’t have a neck – that is added later. The method I have been using the neck is the foundation for the needle felted ball. I did find when I needle felted the features the neck had moved and looked wrong……maybe this is the way round it, I’m going to experiment.

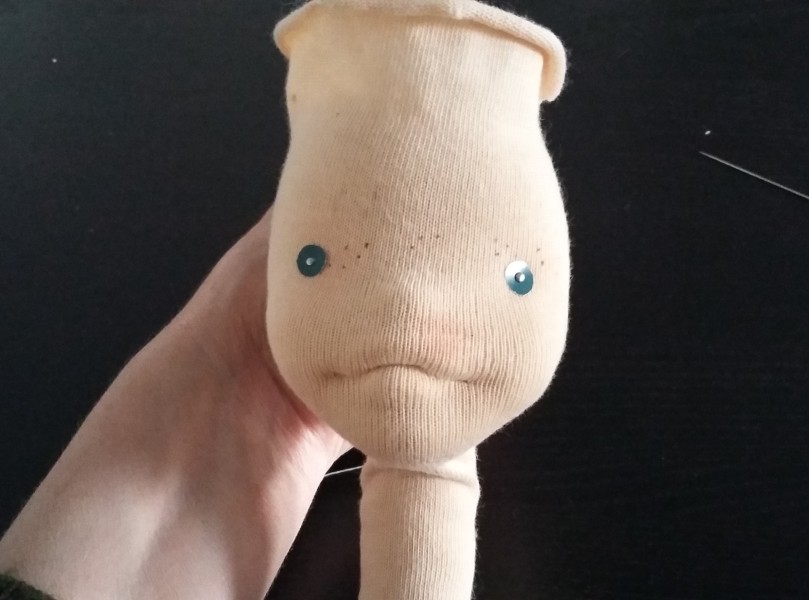
Here is the doll showing different eye positions, the last one is definitely too high, but the other two are possibilities.

She goes from toddler to…..well slightly older (odd) looking girl, all with millimetre adjustments.

Our afternoon session was learning how to process suri alpaca from choosing the raw fibres through washing it to making the finished weft.

Dorota gave us some wool she had processed, which we (tried) to make into wefts, I think I need a lot more practice. She also gave us a bag of wool to process. We discussed this and decided it would be easier to buy an alpaca and give it a thoroughly good wash so we didn’t have to do all that delicate washing and brushing……who knows?!

In the evening we had the ‘Krabbelsack’ where you could take along a handmade gift and ‘grab’ one for yourself. I took a pair of bottle green leather sneakers I’d made ( just like Alfred’s).

Here we all are waiting in the evening sun….

…….and here was the gift I ‘grabbed’, it’s a beautiful watercolour byĀ Maria Asenova, it’s really lovely she is a very talented artist.


European Waldorf Doll Seminar

I couldn’t quite believe I was here, I booked to come well over a year ago. Three days of dolls, making dolls, talking about dolls, dreaming about dolls. My classes were all with Doroto of Mum and Dot.


We spent all today working on the felted ball of wool, first applying the jaw, then building up the cheeks then starting the facial features, nose, chin and top lip.


Things I know now that I didn’t know this morning

  1. If you break a felting needle, cut at right angles to where you lost the needle with a carpet blade…….you will find it, it will look gruesome, your doll will go back together (she may have a headache)
  2. When you needle felt in one direction you move the wool on the otherside, so keep checking and adjusting
  3. Making the features roll a tight ball/sausage shape with wispy ends. This saves adding lots of layers and flattening your work
  4. Star gauge needles for most work, crown to smooth the work – the barbs are right at the tip
  5. Meglena showed me how to crochet a weft as I crocheted the wig cap – that I will show you later, it was a real light bulb moment

And finally a sketch by the talentedĀ HannahĀ who is (among other things) a children’s illustrator.

2018-05-25 18.18.40

That’s Meglena and me having dinner, I’m instantly recognisable by the stoop of my shoulders!

Cutting and stitching

The cutting phase of making a doll is really important, it’s worth taking your time to make sure you cut along the grain right. Each piece of fabric I cut exactly along the warp and weft. The warp (vertical) I cut on the right side of the fabric and the wefts on the wrong side as you can see them clearly. Then I am able to ‘square’ the fabric, it often doesn’t look square but I know it is because I cut so precisely.

2018-05-19 17.41.13
Cutting along the weft

To sew the body, arms and legs I draw around my templates and stitch using the double stretch stitch on my machine. You have to be so careful you get everything right as there is no way you can unpick it if you go wrong!

You can see from the first picture I put the ‘bottom’ seam in first. All my experimenting with bottoms is in my previous postĀ Letā€™s talk bums!Ā That’s the seam I’m talking about that creates a little bum.

Next the exciting/scary bit adding the threads to define the nose and mouth. Here’s the little girl I found on Pinterest who I have used as inspiration, and the new doll. The eyes will be rich dark brown not green paper and pins!

2018-05-20 08.05.41

I’ve been trying to find the girl’s name, or what part of Africa she comes from so I can name the doll, but no luck yet.

I have found a wax printed cotton fabric at my favourite fabric shopĀ Flo JoĀ , I popped in to get some lining and other bits and pieces and stumbled across it. It’s apparently made using West African print techniques and patterns, lush isn’t it? Perfect for a little dress.

2018-05-22-11-30-32.jpg


This is how it all begins

A length of wire about 13cm long wrapped tightly around itself, then needle felt a ball. In my mind I’m thinking ‘Who is this going to be?’ I have ideas in my head of a little girl, dark skinned with big brown eyes, a mass of gorgeous curls.

This is a couple of hours work, adding layers slowly and felting firmly, listening to podcasts. I use 3 different needles from Heidi Feathers, the red end for deep stitches and the black and blue ends for finer detail.

2018-05-14 21.35.13

Then I when the ball is about 24cm in circumference I start to shape the head. This is my method – which maybe a little odd, but it seems to work. I put a picture of the side and front view of a dolls head up on my monitor (this one was I found using a google search). Then using pins I line up the nose, ears and the top of the head. Then by eye I add more wool so the shape is the same.

2018-05-16 17.51.15

First the chin, then the nose and the cheeks, it all looks a bit scary now and you wonder will it come together! Have faith…..keep going

2018-05-17 08.13.20

Next you add the lips, and they don’t need to look like real lips, and they are surprisingly near the nose – everything changes when you put the ‘skin’ on.

2018-05-17 17.42.21

I have a practice skin which I apply then. A while ago I got as far as adding freckles to a doll and putting the blush on the nose and lips, but I really wasn’t happy with my results. So this became my practice one! If you look carefully you can see those freckles – they now seem to be over the eyes…….that fabric really has been stretched! So here is the next doll with paper eyes, freckles on her eyelids and a bit of a smile.

2018-05-17 20.21.09

There are a few tweaks needed but I’m pretty happy with the result.

Lattice bonnet

Every little girl needs a hat, and Ottilie is no exception. Such a sweet little girl needs a bonnet. This pattern is a free Ravelry one byĀ Birch Hollow CottageĀ it’s easy to follow and a joy to make. Here’s the bonnet blocking on my yoga mat!

2018-05-13 11.09.38

And here she is wearing it.

By the way Ottilie is up for sale in myĀ EtsyĀ shop Tuesday 15th May 18.00 BST

Faded denim jacket

I’ve loved making this denim jacket, it’s theĀ Liberty JaneĀ one I’ve used before. To get the colour denim I wanted I bleached the fabric overnight – it was very resistant/good quality denim, and eventually I got the shade I’d imagined. Then I cut out all those pieces

2018-05-03 19.57.43It’s the details I love so much, making teeny tiny flat felled seams, little pocket flaps and tabs on the back.

2018-05-05 17.16.24

And so here is Ottilie, looking cool and casual in her jacket and silk dress.


Having fun with embroidery

I’m loving making the outfits for Ottilie, I have all these ideas spinning in my head. I adore embroidery detail and the simple wrap dress is the perfect place. By the way the fabric is a beautiful raw silk that looks and feels like linen – it’s lush.

Taking my inspiration fromĀ yula_handmade_2008

embroidery 02

I’ve chosen a palette of muted silks.

2018-05-03 18.51.41

And I’ve started the journey around the hem. Should I go all the way, or just the front?

2018-05-05 06.38.49

Making Ottilie

I’m a bit in love with this little girl, her big brown eyes and white blond hair. In my other life I am a midwife and I get to meet lots of mums and their new babies, this name like a lot of the names I’ve used, it’s ‘pinched’ from one of those!

Here’s how she started, a firmly needle felted ball on a wire neck. I’ve made two other balls ready for the Doll Conference in Amsterdam I’m going on at the end of the month.

2018-04-21 21.08.19

The other (sunny) day I was out and saw a little girl in a floral dress with denim jacket and straw hat – I thought this was just perfect for Ottilie. I actually thought she needed two pretty dresses, one is complete with pin tucks and lace trim.

2018-05-02 18.29.45.jpg

Then she will have a wrap dress and that very important denim jacket. I really want her to have a pale denim jacket and I’m desperately trying to bleach the denim I have – it’s very good quality and the dye seems quite resistant!